AND WHAT ARE THE FIRST THINGS THAT CATCH YOUR EYE AS A JUDGE? A TEN-PART SERIES.
That is a great question and I could go on and on for hours about what it takes to win. This article will be part one of many as I talk about the basics of horsemanship. I always find myself wanting to get up and help everyone in the class and give my opinions on how they could improve their scores. That is the trainer and coach in me coming out and I realize that is not my place as a judge to do that while I am judging, unless I am asked after the class during a down time at the show.
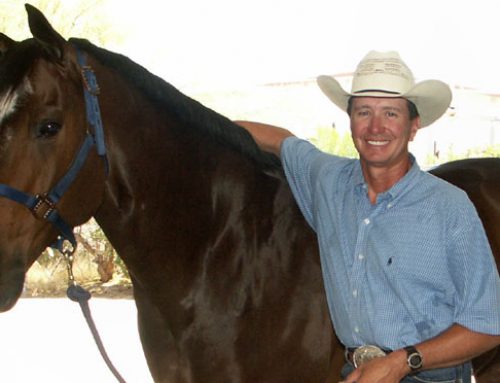
The very first thing I notice is your hat. I don’t personally care about how much silver you have on your saddle, or how much bling you have on your outfit. But, if your hat looks like it has been in a rain storm or you slept with it on, my first impression is going to be very low. First impressions are the most important, and as humans we all make first impressions especially being a judge. We are paid to do a good job and evaluations from the start are where it all begins. You do not need to have a thousand dollar hat, but you do need to have it shaped correctly by a knowledgeable person that can clean and block your hat. I have a 100x myself that cost that much and have had it for over 10 years. You can buy a 25x or 50x and if taken care of, will look just fine and last a lifetime. But when it comes to hats, you get what you pay for. It will need maintenance from time to time to keep it looking good. I live in Arizona, and I purchase most of my hats and clients hats from companies in Georgia, Texas, and California. I only allow about three people that I will let touch my hat when it comes to reshaping and cleaning. It must be kept out of the rain, it must be kept out of the horse trailer on hot days, and when you are done at the end of each day, lightly brush it off, and store it in your hat can making sure that the crown holder is adjusted properly where the brim does not sit on the bottom of the can. Do not sit it down on the brim, always upside down on the crown, and never, ever sit it on the bed! That is just really bad luck! I guess now that you are aware of how important the hat is in my opinion!
This will be the first installment with many to follow on the topic of Horsemanship competition, and how to get to the level of competitiveness that you desire. Stay tuned for more great tips on how to constantly improve!
Thanks…Mark
In this second installment we are going to get into proper equipment, tack, and attire. Saddles, bridles and tack are the next thing we notice when an exhibitor walks into the ring. I am not one who likes tons of silver, and who bought the most expensive saddle. Clean tack that is properly adjusted and well fitted is what I notice. I would invest in a quality hand made saddle with no silver over a more expensive factory saddle loaded down with silver. Make sure that the saddle size fits you and your horse. Sometimes a plain tooled or basket stamp saddle works the best for me. Remember you are showing off yourself, not your saddle. Make sure the cinch straps, leathers and all keepers are tucked in and not flopping all around. Make sure that everything is tucked down and nothing moves. That also goes for hair on women. Tuck your hair up in a bun and make sure it is tucked up in the back. No hair sticking down from under the front or side of your hat. Hairspray it down and no ponytails, anything that moves will distract and make the rider look loose. For the girls, put on the makeup! You are showing yourself off, so always look the best you can. Remember to put it on a little heavier than normal as you are being viewed from far away and it needs to show up. If you have excessive jewelry such as too many earrings, eye piercings, nose rings, etc… take them out! Put them back after the class is over, I am a traditionalist and there are places for everything. I mention this because I see it from time to time.
As far as outfits go, any clean looking and well fitting equitation blouse will work just fine. If you have the expensive thousand dollar tops then go ahead and wear them. It is not necessary to have all that, and you can purchase a well fitted blouse with a neck scarf for well under a hundred bucks. Make sure that your colors match and your chaps and blouse are the same color, black blouse, black chaps, etc… It is important to create the nice straight line from top to bottom. Don’t break up that line. Your hat should also match your outfit. Gals wear felt hats but the guys can get away with a nice well shaped straw hat except for the big shows. Guys have a little more leeway and can get away with a nice white or solid colored heavy starched shirt and starched jeans under their chaps. Girls need to have slacks that match their chaps. Sorry, but that is just the way it is, the guys always seem to have it easier in attire.
In the third installment, we will get into more specific riding issues and riding the patterns correctly.
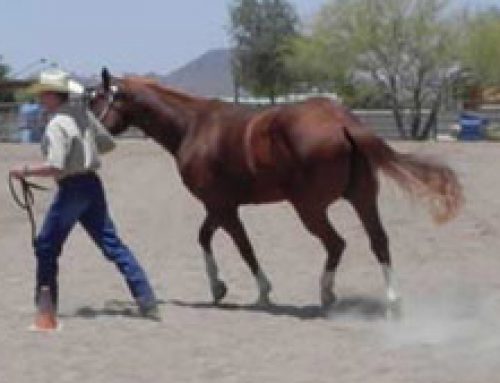
In this third installment of horsemanship tips, I want to talk about the first steps up to the cone and the start of your pattern. The first major things that I look for other than what we discussed in earlier articles, is for proper adjustment of tack, equipment, and communication between horse and rider. I want to see stirrups that are not too short, not too long. Too short of stirrups will put too much bend in the knee. Too long of a stirrup will have the toes down, lack of contact in the stirrup and to straight of a line with little bend in the knee. I see both of these situations in all the shows that I judge. Most of the time it is the latter with the longer stirrup and reaching for the stirrup and always trying to keep the leg way too far behind the hip of the rider. I realize that the line must start at the shoulder, drop through the hip, and finish up through the ankle. However, many times I see the riders constantly pushing their legs back too far, which puts the ankle too far behind the line. This will only put the rider out of balance as they are riding on their crotch. Too short of a stirrup will tend to keep the legs ahead of the line. Proper stirrup adjustment will make it possible for the rider to apply pressure to the ball of the foot, with the heels down and slightly out so that the calf of the rider is close the barrel of the horse. This will make it able for the rider to maintain constant contact and communication with horse at all times.
An obvious observation is incorrect bridle adjustment as well as cinches not tightened up and tucked away. It is easy to tell how the pattern will ride on most occasions when there is communication between horse and rider before the pattern starts. If the horse is pushing on the bridle and the rider has that worried look in their face of lack of communication with their partner, it is very easy to see from our point of view. Most good judges start to get a feel of the rider and the pattern from the time that they nod their head for them to start the pattern. It is very important to start a few feet back from the start cone, so that one can let their horse walk a step or two and un-track them from standing still. Flow is the most important part of the pattern. Do make sure that if the judges are looking up and if you see that one of the judges in a multi judged show nods for you to go, that you definitely go! Do not under any circumstances make the judge wave to you, or nod more than once for you to commence with your pattern. If there is a work order, listen for your order of go. Do not be goofing around and not paying attention to the announcer or ring steward. If they call your number and you are not up to the cone and ready to go, you will be dropped a sufficient amount of points. Pay attention and be ready to go, and make sure that you are not training or jerking on your horse’s mouth when you are in the ring, especially when we are looking. That applies as well as when you are finished with your pattern and waiting on the other end of the arena until the other patterns are finished. It is amazing what we can see from our vantage point, and always assume that we are always looking at you. And always pay attention to your rind steward and give them the utmost courtesy that they deserve. They work hard and are directed by the judges as what to do throughout the day. I often see exhibitors treat the ring stewards, and gate people with little respect. Trust me here on this, we usually hear about things like this throughout the day.
When you start your pattern, make sure that you always look up and forward. The only vision down should be between your horse’s ears. Ride with confidence and keep your focus forward. A look of confidence will go very far in convincing us that your pattern will be ridden correctly.
Stay tuned for more installments with helpful information and insight for making all your rides the best!
On this installment number four, I want to get into the finer parts of riding your patterns. Consistency is the key on maintaining good scores on your patterns. Most scores are based on a 0 to 100. As soon as your pattern commences, the judge will start to analyze where your range should be, 60’s, 70’s 80’s or higher or lower. Riding your pattern will raise or lower that score like a thermometer. There are obvious major penalties that can drop your score such as break of gait, wrong leads, riding the pattern incorrectly, kicking out, etc… One of the most common issues is just simple lack of communication between the horse and rider, including lightness in the bridle and hands, and response to the rider’s legs and spurs, among other issues. There is no substitution for an extremely well broke horse. It is easy for us to tell if you did your homework or not. It can sometimes take up to as long as a year to work together and gel with your horse. You should also notice that your patterns and communication with your horse is getting better with every ride or show, and not decline. If there is not at least a small amount of improvement going on with your horse, it is time to reevaluate things.
At the beginning of the show, make sure to get your patterns plenty of time ahead of your class. Sometimes you will be able to pick up the patterns the day ahead of time. Study your patterns and know them well. I usually have my riders practice the pattern once or twice at the most. Practicing the pattern over and over with your horse will only end up making them anticipate the pattern, and you will end up riding on the defensive side. Horses are smart, so practice parts of the pattern, not the entire pattern. It will all come together when you go in the arena. If your horse anticipates stopping or loping off at the cones, then ride them in the practice arena to fix that. Lope past the cones and stop at places where they are not supposed to in the pattern. Mix it up. Get your horse to trust you by the way you train and ride him.
Make sure to ride your patterns with symmetry! Ride your circles round and exactly as written in the pattern. Riding circles does not come easy for everyone and is a maneuver that must be practiced at home. Most patterns involve the use of cones, however sometimes I will design a pattern without cones to see how much vision the rider has. Sometimes riders get lost without the aid of cones. Practice at home with and without them. If cones are used, keep the same amount of distance from each cone in the pattern. If you start your pattern six feet to the left side of the cone, and you end up stopping and completing the pattern two or ten feet away, your pattern is not symmetrical. Having periphial vision is very important to executing correct patterns. Keep your head up and your eyes forward. Vision is very important and I sometimes see trends that bother me. When some exhibitors execute a turn, they will look so far into the turn that they lose vision and feel of the horse’s head, neck and face. They are looking so far into the turn that they don’t realize that the horse’s head is tipping the other way and now they are also crooked with their shoulders. Looking slightly into your circles and turn are important. Just make sure that you don’t get caught up in trends that are not true horsemanship fundamentals.
On riding your pattern, make sure that you pay attention to all the other patterns that are being ridden that day. You will have to take your level of competition up to beat the others. This will make you aware of how good you are going to have to be that day. Don’t get psyched out, just take your game to the next level and ride up a notch. This will also make you aware of any problems areas with the pattern. If everyone seems to be having issues with a particular part of the pattern, find a way to ride it better. Like I said in earlier articles, if there is a work order, be ready and at the cone. If there is not work order, volunteer to go first. Confidence is an attractive horsemanship quality. Jump up there and set the standard for the others to beat. If things start to go wrong, keep riding and finish strong. Never quit riding and showing. Complete your pattern and move to the rail with your head up. It is not necessary to nod to the judge or hesitate for approval after finishing your pattern. Keep your head up and smile, and show confidence!
There is much more to come in following installments. Next issue # 5, will continue with more tips and some of my pet peeves that will kill scores. Things you will not want to do in the ring.
On the last installment we talked about riding your pattern correctly and symmetrical. Most of the articles in this series are to give helpful advice on what to do correctly to raise your score and help you with getting to the next level. However, I also want to make sure that I have plenty of ideas on what NOT to do! There are so many times when I am judging and want to just get up and help someone with their ride. That is the trainer and coach in me. Many times I will say to my self, “If they just didn’t do that particular thing in their pattern, it would have gone so much better.” There are also times where the level of competition is above average at many weekend shows. Riding a clean mistake free pattern can land you close to the top without having a prefect ride.
Every judge has pet peeves, likes and dislikes. I would say that my biggest issue is using the spur stop on a loose rein and only riding the horse with your legs. This includes riding the horse in the pattern or on the rail with the spur brake to adjust your speed, and having your horse canted too far with his hip to the inside. Usually when this happens, the horse will not move correctly in a three beat cadenced lope. Spur stopping your horse will also push your knees out and you will loose contact with the sides of your horse as well as creating unnecessary space between your leg and the barrel of the horse. An extremely loose set of reins will create additional lack of communication with the horse. One will also have to raise their hands way too far in able to reach the mouth of the horse when picking up on the reins. I understand that the western pleasure class has created some of this, however horsemanship is an entirely different event. Many exhibitors will also draw their horses down to the trashy slow lope which will make it easier for them to sit the saddle quieter. I understand the thought process in this concept, but I want to reward proper movement at all three gaits.
It is necessary for horses that do the trail event to have a spur stop on them to be able to lope into a six foot box and stop properly and suddenly without pulling on their mouth to avoid stepping out of the box. I also feel that having more buttons on your horse is a good thing as long as you do not take it to the extreme. Riding your horse in the trail and western riding will require leg pressure to maneuver around obstacles freely without pulling on your horse’s mouth. If your horse does have a spur stop, there is nothing wrong with gently picking up on the reins, squeezing with your legs, and using a soft verbal cue to halt. Reasonably loose reins are ok, as long as the exhibitor can remain light contact with the horse’s mouth by picking their rein hand up a few inches. Total communication between horse and rider is what I personally look for. Hands, legs, and your seat used equally will make the communication for performance work great.
More tips to follow next month and until then, enjoy educating your horse and yourself!
In the last few installments, we talked briefly about circles and riding them correctly and with symmetry. In this installment, I want to elaborate a bit more on being able to ride perfectly round circles. Almost every pattern today will consist of circles, multiple circles, circles in different directions, and also different speeds. With everything else close to even with the exhibitors in a tight class, there is always something that separates one from another. Usually, that is how correctly they ride their circles. If you are riding an oval, teardrop, triangle or lopsided circles, you can plan on that part of the scoring to go way down. Making up with the rest of the ride may not be enough to bring your score back up to where it was, or needs to be. This also includes riding your circle in the correct location in the arena. You might be able to get your round circles figured out, but they end up off to the right or left of center.
As a coach and trainer, I feel that circling is probably the biggest issue that people have problems with. They might be able to ride round circles at home due to the comfort and familiarity of their arena, but when they go to a different arena to compete, all the surroundings look different. It is very important to look at the arena just walking around on your horse and find waypoints for centering your circles, such as end gates, center markers, fence markings or beams on indoor arena walls. Take note on the size of the arena so that you will not be bouncing off the walls if the arena is very small. On the other hand, make sure not to ride your circle too big if you are in a huge arena. Look at the arena and get a game plan on where you are going to ride your circles. Where are they going to start, and where are they going to end. Always try to ride the pattern as close to possible of the description of the pattern provided.
Make sure that when starting a circle that you keep these two things in mind. Number one is to always position your horse to depart into the circle from a walk, or a jog if asked for in the pattern description. Never try to ask for a lope departure from one step or a complete standstill. I tell my students to untrack their horses from a standstill at least a couple of walk steps or more, to straighten the horse’s body out, and to get a clean responsive lope departure. Number two is, always lope a couple of strides straight and then gradually find your circle and enter it. If you start dramatically into your circle, your horse will start dropping his shoulders into the center of the circle and then you will not have any control on the size or symmetry of your circle. You will have to take what he gives you. If you have a very small first half or your circle, you will have to finish it that way, you have to keep both halves the same size.
The size of the circles is very important, and when a judge specifies in the pattern for a small circle followed by a larger circle, there must be a definite change in the overall diameter of the circles. Body control and steering will be necessary for riding really great circles. Speed usually goes along with this request on circles. If the judge wants a large fast circle then a slower small circle, that is how you must ride them if you want a big score. I would say that the majority of the time, many riders trope, or lope their horses so slow in the small circles, that it is hard to tell if they are actually in a three beat lope. Then when they go to the large fast circle, they simply go to the regular nice lope. This will be cause for a very dramatic reduction of their score. This usually happens for a few reasons. Some reasons might be that their horse is not broke to do the faster circles, they are afraid they will loose their seat in the process, they are just too uncomfortable riding the gallop, or maybe just because other people get away with doing it. I would suggest that people practice going fast at home and teaching your horse speed control. Start slow, increase to galloping a few large fast circles, and then back to the small slow circles. Remember that the Horsemanship class is the stepping stone to Reining.
Training your eye for the circles is something that once you figure it out, will stay with you forever. Forward vision is the most important factor in riding great circles. I always have my students visualize a clock. The north end of the arena is noon and the south end is six o’clock. If they are riding right circles, when they approach twelve, their vision should be focused between three and four. Keep the vision with your location, so that when you are at six, your forward vision should be between nine and ten. This will give you a fix on where you want to be in your circle, and give you enough time to make corrections and adjustments to get there. Sometimes I will have my riders use four cones placed in a square about 100 feet apart and lope the circles inside the cones, then graduate to one cone in the center of their circle, then to no cones in the circles. Peripheral vision and feel should take care of most everything else with your horse. Make sure to get out of the habit of only looking down or straight ahead a few feet when riding. If you have a hard time with continually looking down, I have small goggles that I designed to not allow looking down. My students get to use them quite often, and it breaks bad habits real quick.
Look for the next installments on more advanced tips to constantly improve your talents and get those high scores at the horse shows!
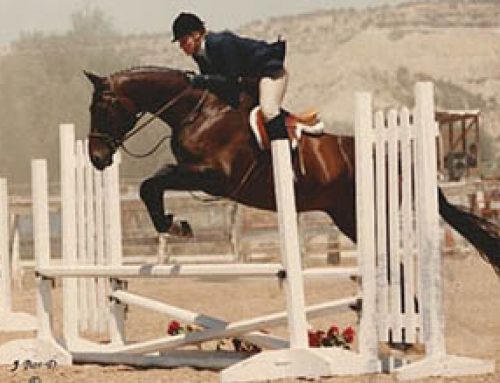
We have covered quite a bit of ground on riding great horsemanship patterns over the last six articles on this topic. On this, the seventh issue, I want to talk about things that one can do at home to improve your rides at the shows, as well as other things to keep in mind. I feel that leg strength and lower body control is one of the key ingredients for a solid base when riding. It all starts at the bottom and works its way up, in able to have steady upper body control, as well as having total overall body position and control. I feel that riding in an English saddle from time to time is the best way to achieve this. Many horsemanship exhibitors also show in the equitation classes as well. They know how much more difficult it is to ride in an English saddle and maintain proper lower leg control. For those that do this, they seem to master the Western saddle with greater ease. I would suggest owning or borrowing an English saddle to ride in at least once a week if not more, to create stronger lower body control and improve your overall riding, even if you never plan on showing in English events. I know of roping horse trainers that occasionally put their clients in an English saddle so they actually learn how to ride. Once back in the western saddle, they felt so much more in control, and their riding abilities and balance improved almost overnight!
Another exercise that I recommend is to practice standing in your stirrups while at an extended trot. I suggest my riders to start at the jog, stand up in the stirrups so that all the weight is on the ball of their foot, with their heels still down and toes pointed slightly out. From there, make sure that you maintain this position with gripping with lower upper leg and your upper calf on either side of your knee. From here increase the jog to an extended trot and maintain this as long as possible. It is very important to keep your upper body vertical and not bend over to cheat when doing this drill. It is important to keep in mind that the three main points be lined up while doing this exercise which are, the point of your shoulder, your hip, and your ankle be kept in as straight of a line as possible. If you have not done this before, you will want to start slow and work your way up to where you can do this for a few minutes or more at a time. I have my students do this until it hurts, go past it for 30 seconds and then sit back down, and break to the walk and rest. Three or four sessions of this everyday will improve your lower leg control and increase your overall balance to a much higher degree. Some of my clients jokingly call it torture, but I remind them “no pain no gain”. Everyone needs to know how far they can push themselves, and if you can then sit straight down slowly back into the saddle and still maintain the proper amount of weight in your stirrups, without sitting on the back of the cantle, then this exercise is working to your advantage!
Next month I have some more additional tips that you can do at home to constantly improve your talents, as well as more show ring tips that can help exhibitors raise their overall scores in the arena! Until then, keep practicing good habits.
In the last installment, I mostly focused my article on exercises you can do at home to strengthen your skills in the arena. There is no substitution for doing your homework well. It will pay off at the shows, and it is easy for most of us judges to see who has done their homework and who has not, just as a teacher or professor can see in school. I am not sure how many installments there will be in this series. That is due to the fact that I am always thinking of things that I recall while judging that have kept me thoughtful of how to always make one the best that they can be as a rider and exhibitor. So far, we have focused on the obvious areas that seem to plague many riders. As we progress in to the installments, we will start to fine tune things to make you the best you can be. Areas of horsemanship that not everyone thinks about, but can dramatically affect your score.
Sometimes I will be judging a show and I realize that many riders do not have a trainer, or have the opportunities to practice as much as others. Hopefully all of these tips in the series will give you some insight to work on areas that you might not know were so important.
I want to discuss some more obvious areas that I might have forgotten to mention in the last seven installments that are so important. I want to talk about showing on the rail after your individual performance. I take it for granted with my clients, and they know to never circle off of the rail to gain better rail position. I still see this at some of the smaller shows, and amazingly will see it from time to time at the bigger shows. This also includes circling around, cutting the arena in half and drastically cutting the corners to gain a better position. This will dramatically drop your scores if not placing you at the very bottom of the class. Rail position is very important and a very vital part of the score. Most rail work portions will involve about twenty to thirty percent of the overall scores. Most of the time when I am scoring, I have the placing pretty much marked on my notes and only use the rail work to break ties with equally talented riders. I will also ask for the extended trot and dropping stirrups if need be, to find and compare the best riders in the class.
With that being said, it is important for a judge to be able to find you in the arena, and if you are hidden up by other horses all the time, in some instances it could affect your score. The best way to find the correct rail position is by maneuvering your horse so that you can be seen. Slightly cutting a corner, loping off at the appropriate time, and rail awareness are important horsemanship qualities and skills. If you have to hesitate slightly and wait to lope or trot, it will help you to maintain rail position. This does not mean waiting to lope off to the point that the judge will mark you down. When most judges call for a particular gait, then that is what they want to see. This is particularly important when we are looking directly at you. Many times, I will be looking directly at an exhibitor and want to see how they negotiate the upward or downward transition. If I find myself waiting on them, I will refocus my attention elsewhere and drop their score accordingly. We talked about peripheral vision in last installments, and it is very important to be aware of it on the rail as well. Keep your eyes up, feel your horse with your hands and legs, and do not look down. Feel his mouth with your rein fingers and know that he is loping and trotting properly on the rail, as well as in your individual work.
Another area that most exhibitors do not know that they are doing is readjusting in the saddle between maneuvers. After a stop or turn, I will notice that they will instinctively shift their legs or readjust in the saddle before the next maneuver. This is usually because they are out of position and need to get back to their comfortable spot again. This usually happens with the novice and younger riders, but I still see it at the advanced levels. It usually happens without most riders even aware that they are doing it. This is why it is so important to have a friend film your rides at the horse shows and watch them over and over. You will be your best critic. Sometimes this will happen due to the fact that the saddle is not properly tightened, and will shift to the left or right after turns, lead changes, circling, or stops and backs. Properly adjusting the saddle and cinching up correctly is extremely necessary to keep the saddle from shifting. This does not mean to tighten it up so much that it is making your horse uncomfortable. It just means to always have someone check your cinch before you go in the arena, just as you would have someone finish up the fly spray, final brushing and clean up before entering the arena.
Keep up to date with all of the installments on my website, and look for further tips in the months ahead. I have tons of information to share and feel free to e-mail me anytime with thoughts and questions. Ride safe and always practice good horsemanship.
In this installment number nine, I want to continue to give tips that seem to get in the way of riding that perfect pattern. Many of the horsemanship patterns today are using fewer cones in the patterns for marking out the designs. I have started using this practice, especially in the advanced classes so that I can determine that a rider is able to see the pattern with the peripheral vision that I so often talk about. I think that cones are a necessary part of the pattern for novice, younger or less experienced riders, but many times, I will design a pattern with one start cone and then let the riders decide where the pattern is to be ridden in relationship to the arena. I always make sure to be as accurate as possible in describing the pattern and then let the exhibitor show me the correct path. Many times, the first few riders will have the best opportunity to ride the pattern and set the standard. In most cases, the arena will be smoothed out and the first few riders will have to set the course. If they do so properly, the others will most likely follow in their hoof steps, so to speak. If the first few riders do not execute the pattern properly, it will be to the advantage of the following exhibitors to ride it properly. This is why it is so necessary to always pay attention to the competitors in front of you, and that work after you. Just because one rider rode the pattern correctly, that does not mean that it has been ridden properly.
I talked briefly about stops and backs. I can not emphasize enough of the importance of a great stop and back. In a vast majority of the patterns that I see at the shows, the stop and back is the final maneuver. This is where the thermometer rises and falls on the score card and can make or break the pattern. So many times the exhibitor will ride a great pattern, then have a below average stop and back. This is where the pencil is making the final scores and marking down on the sheet. It is hard to make up a good score on this maneuver because of the importance of a good stop and back. The only way to achieve this maneuver correctly is from practicing good habits every time that you ride. It is important to ride your horse into a proper stop and back every time that you ride. If you let your horse stop crappy at home from time to time, he will do it at the horse show because that is what he has been allowed to do. In order to achieve a good stop, your horse must be straight. When I say this, I am referring to the body position of your horse for the last few strides going into the stop. If a horse is crooked before the stop, they will most likely stop and back crooked. The scenario that I see most often is when horses are over canted with a hip or hock to the inside of the lead leg. This helps them move better, but when they execute the stop with a hip to one side or the other, the rider will most likely have to make an adjustment to straighten out the horse before backing. If a horse stops with his hip to either side, and his hind feet are not inline with the front feet, they will almost always back crooked. Collection will fall apart when this happens as well. You will want to use the stop and back as the best way to lift your score above the others.
One final point that I would like to make in this installment, is to always ride your horse the same at home that you do at the shows. The most important thing is to ride your horse with one hand and in the box that I have described earlier. This is the location above the withers and in front of the horn. It is an area about the sixe of a twelve inch square box. This is the location that you will communicate with your horse when you are riding the pattern at the shows. It is necessary that you communicate with them from this area on your daily rides. If you go outside of the box, your hands will be out of position for proper execution of maneuvers. This will lead to improper face position and other issues. Your horse should neck rein from this position. Remember that we as judges are looking for the most fluid, smooth and correct pattern as possible. Hands out of the box will only tend to make the performance look unfinished.
I have more tips scheduled for next month, so stay tuned and feel free to contact me with your thoughts. I love to teach and give my thoughts to people who are always trying to bring out the best in themselves and their horses.
This article will be the final installment in the series of riding correct competitive horsemanship patterns. I could probably write thirty or more installments, but it is time to wrap up this series and get going with additional interesting topics that I have in store. I am sure that I will be leaving out some issues that affect most riders from time to time, but if one will review the installments from time to time, I am sure that it will help with the basic issues that riders need to be aware of to improve their scores and success in the arena. All of the previous installments can be found on my website listed below.
As I have mentioned in earlier installments, most of the ideas that I have written have come to me as a coach, trainer and judge. Over the last few weeks, I have judged some major shows across the United States and International Championship competitions. I seem to see the same mistakes from a majority of the competitors. As your horsemanship skills improve, you will advance to tougher competition and be asked more of from the judges. It is time to step up and show off your skills. The patterns will become tougher to ride, as the judges will need to ramp up the difficulty in the patterns to match the competition. It is the only way that judges can separate the riders and find the true winners.
I usually ask for numerous maneuvers in the advanced classes, such as counter canters, loping and trotting square corners and putting in a flying lead change or two in the patterns. Spins, turns, and rollbacks will also be found in the majority of the patterns. You must be prepared to be able to drop your stirrups and do an extended trot in both the pattern portion, as well as in the rail work. With this being said, it will be important to work on all of these maneuvers on a daily basis. If you push yourself at home, you will find success at the horse shows. Making these maneuvers happen with one hand while keeping your hand in the “box”, as I have described in earlier issues will be the issue for most everyone.
While keeping everything under control, your sight must be forward with your head kept still. Try to keep your eyes looking at a location up to fifty feet in front of you and keeping the peripheral vision working at all times. Looking down is obviously wrong, but as is looking so high beyond the field of vision, that you loose hand and eye contact with your horse. Developing feel as well as sight will become a skill that will enhance your performance. Keeping your reins even and feeling your horse’s mouth to make sure that your reins are even take time to develop, but are easily recognized by judges. Turning or rotating your wrist to the left or right or moving outside the box with your hand will be the first thing to make your reins uneven and drop your score due to the fact that you will loose that even rein feel, and it will show up in your pattern.
Another major factor that one must keep in mind is that when a pattern asks for a 180 or 360 degree turn and then lope off on a correct lead, you must keep in mind that you might actually want to ask for less or more in your turn to get the proper body position for a really correct lope off. For example, if the pattern calls for a left lead, stop, 360 turn to the right and right lead, you should actually turn a 350 or a bit less to have the shoulder in the correct position slightly to the left for the right lead. These are the little things that will enhance your performance. If you are at the cone or start position and ready to lope off, make sure to untrack your horse for a step or two to make sure that the lead departure is smooth and has an effortless look to it.
I hope you have enjoyed the installments one through ten, and look forward to sharing some more of my thoughts and ideas on articles related to helping improve your skills with your horse. The next one will be a good one, and is related to anyone that owns, or rides or shows a horse at any breed or competitive level.
Be safe and enjoy your horse!